
Connecting to the Internet
(Dial-Up)
Section 1: Configuring your Modem
Make sure the modem is properly installed as per the
instructions provided by the manufacturer. If you are sure the modem is
properly working, proceed to Section 2.
1) Click on the Start button, scroll
up to Settings then open Control Panel.
Look for the Modem icon in the Control Panel
box and double-click to open the Modem Properties menu
box.
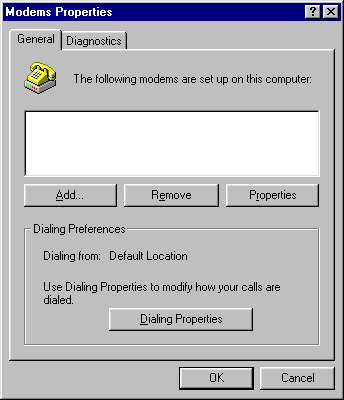
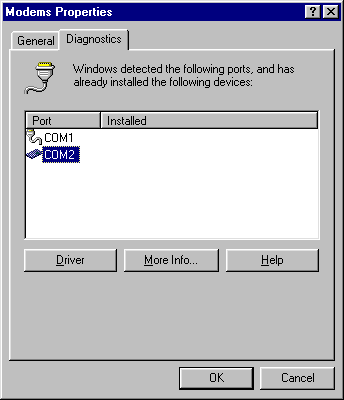
2) With the Modem Properties menu box
open, select the Diagnostics tab and note through which
COM port the modem is communicating. Highlight that COM
port and click on the More Info button.
Modem
Properties menu box.
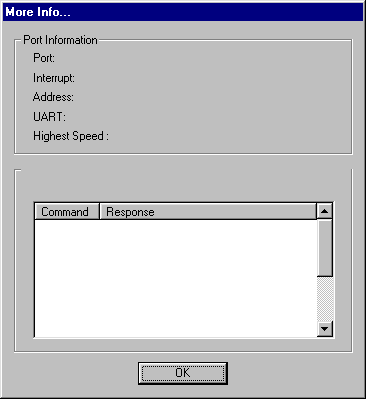
Note: At this point, the computer is going to prompt
with a message to wait for a few moments while the computer is
communicating with the installed modem. If the modem is properly
configured, some alphanumeric characters will populate the Command
and the Response columns, as shown below. If the Command
and Response columns remain empty, the modem is not
properly configured. Refer to the documentation supplied by your
manufacturer to ensure that the modem has been installed and configured
correctly.
More
Info... menu box
3) If the modem is responding correctly, click on OK
in the More Info menu box; click on OK
in the Modem Properties menu box. Close the Control
Panel menu box.
Section 2: Configuring Dial-up Access in Windows 98
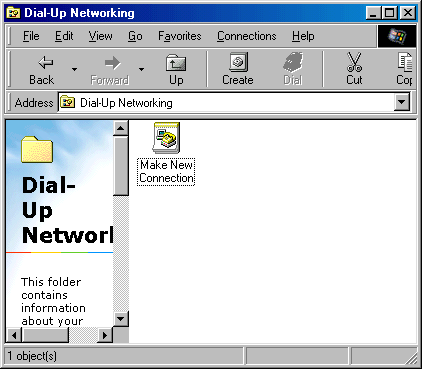
1) On the desktop look for the icon
called My Computer and double click that icon to open My
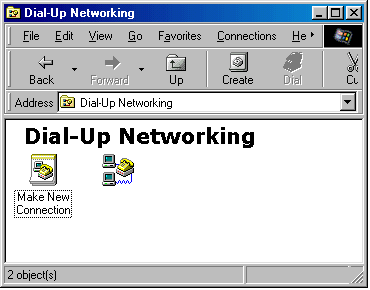
Computer menu box. Look for Dial-up Networking
icon double click to open and this will open up the Dial-up
Networking menu box.

2) From Dial-up Networking
menu box double-click on the Make New Connection icon.
3) A menu box called Make New
Connection will open and under "Type a name for
the computer you are dialing:" replace My
Connection with UCSF. The next box,
Select A Device, will automatically populate with the name of
the modem installed on the PC.
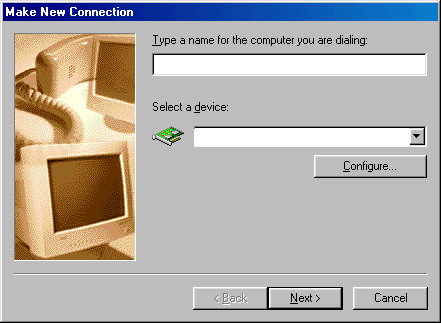
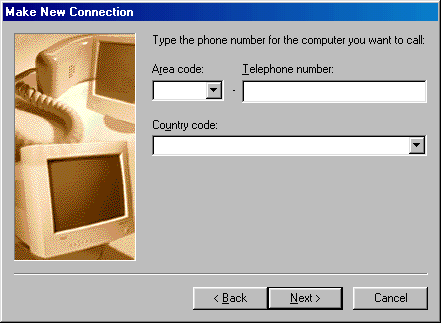
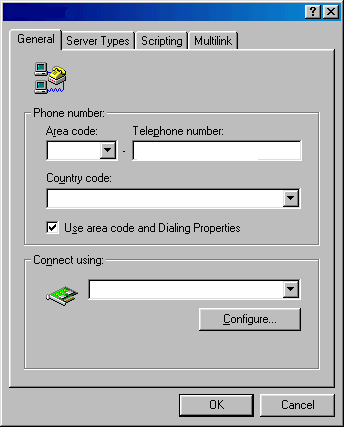
4) After confirming the modem click the
Next button. You will be prompted area code
and Telephone Number. Your ISP will provide you with
the number. The Country code is United Kingdom.
When completed, click NEXT.
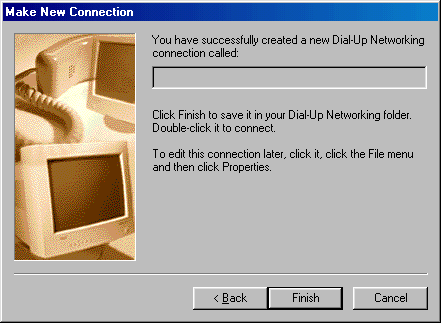
5) Click the Next
button. A confirming message will indicate that a new Dial-Up Networking
connection is created. If this message does not appear, click Back to
the beginning and start again. Otherwise, click the Finish
button to create the icon in the Dial-up Networking menu
box.
6) A new icon will show up in the Dial-up
Networking menu box.
7) Right-click the icon and scroll to Properties.
Left-click Properties button.
This will bring you to another menu box. Below are the settings
that should be found in the 2 main tabs. Check and
configure the settings accordingly.
8) Click on the Server Types tab
and uncheck the boxes marked "Log on to Network"
and "Enable Software Compression".
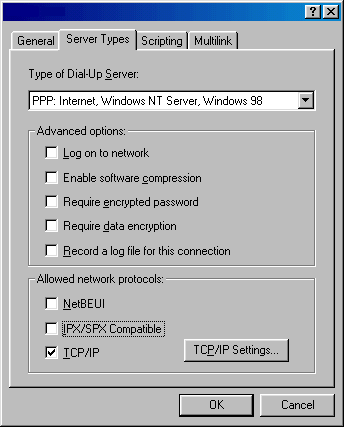
9) Click on the TCP/IP Settings
button to open the TCP/IP Settings window. Make sure
all settings agree with what is shown below.
| Primary DNS |
198.175.158.130 |
| Secondary DNS |
192.35.228.30 |
Section 3: Creating a Shortcut on Your Desktop
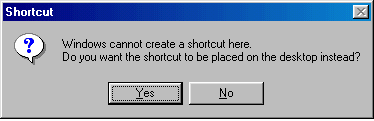
1) From the Dial-up Networking
menu box right-click on the icon again and click on Create
Shortcut. You will be prompted with a message. Press the Yes
button to create an icon in the desktop.
Section 4: Internet Explorer, Mail, and Newsgroup
Settings
Internet Explorer settings:
1) Click on Tools then Internet Options
(In Internet Explorer 4.x, Internet Options can be found under the View
menu).
2) Click on the Connection tab.
3) Click on the LAN Settings (for Internet
Explorer 4.x, skip this step).
4) Check the box marked "Use a Proxy Server"
5) Enter the information into the corresponding
boxes.
6) Click on the Advanced button.
7) Check the box next to Use the same proxy server
for all protocols.
Mail Settings:
Settings for sending and receiving email will vary
from program to program however they all hold the same basic
requirements in common. Those requirements are as follows:
Mail Host:
